Gelish Polygel Review

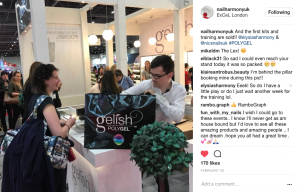
I’ve been meaning to write up my review of Gelish Polygel from Nail Harmony for a while now. We were lucky enough here in the UK to be able to see it first with its international launch being at the Professional Beauty Show in London on the 26th February 2017. With me being the complete addict that I am I had to be first in line to get this amazing new product.

1st ever polygel sale

I have prattled on quite a lot below, so for those of you who don’t want to read everything here is my quick synopsis. Please note this is from my experience and views on the product and not that of Gelish or Nail Harmony.

Pros

  • Lightweight – nearly 25% lighter then acrylics
  • Smells pleasant – no monomer required
  • Flexible
  • Durable
  • No heat spikes – as long as you apply correctly
  • Endless play time
  • Easy to file – dust falls downwards

Cons

  • Can heat spike if incorrectly applied
  • You cant guarantee pink and white designs are cured right the way through especially if you are using non clear forms to sculpt.
  • Can be tricky on extreme nail biters

Top Tips

  • Wet your brush in slip, wipe both sides on the dappen dish, then lightly on to couch roll to get the correct amount.
  • When apply to all 5 or 10 fingers flatten the thumb bead out slightly first to avoid it moving onto the skin.
  • Use a 240 file or well used 180 around the cuticle area to get a flush smooth finish
  • Don’t use forms when extending nail biters
  • Pinch at 10 seconds
  • Flash cure at 5 seconds to guarantee minimal heat spiking
  • Keep away from skin to avoid any lifting

What to avoid

  • Using too much slip can cause lifting and heat spikes
  • Using too much product so that it is under cured
  • Getting the product in the skin will almost guarantee lifting.

Random things I’ve noticed

  • If you’re mobile and you kit is left in a very hot environment like a car, then the product gets lots of air bubbles in it, which takes longer to apply and remove bubbles so try to avoid it.


What Is Gelish Polygel?

Polygel is a new bread of nail extension product. It has been designed, tried and tested in US by Danny Haile and his team to create the ultimate overlay and extension product. It is meant to take the best of both hard gels and acrylics and combine them. It has been created using tri-polymer technology which includes oligomers from gels, polymers from acrylics and polymers from lacquer which gives the product a putty-like viscosity. It is this tri-polymer technology that provides for an easy application, allowing you to work at your own speed to create flawless nails every time.

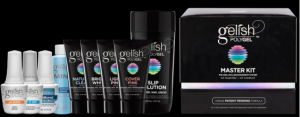
Polygel master kit

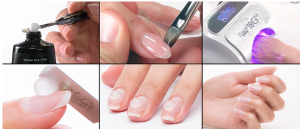
The product its self is then squeezed out from a tube, sliced, and rolled onto the nail. It is said that the product will then sit on the nail until you move it. Although this is mostly true, I do find if I apply to all 5 or these days in most cases 10 fingers at the start, the thumb beads do move due to gravity and have the potential to go on the skin which messes with the longevity of the product not to mention starting the whole over exposure issues. To avoid this I simply pat the thumbs down every so slightly before starting on the little finger and working my way through.

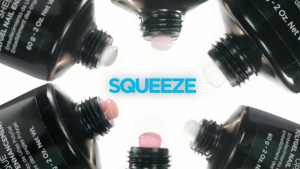
Squeeze polygel colours

The Polygel is moved around the nail by a product called slip. Now unlike a standard liquid and powder application there are no active ingredients in the slip. This means you don’t actually need the slip for the product to work, it is just there to make your life easier and help the brush literally slip over the product instead of getting stuck and gloopy.  Now I still offer nails to a few mobile clients and I did once manage to forget the slip. So knowing that actually I didn’t need it for the product to work and I only needed the tiniest of bits I decided to use cleanse. Now I am in no way recommending you do this, and quite frankly I don’t think insurance would cover you if you did, but it worked and my client got her usual months wear out of the product with absolutely no lifting when I came to re do them – panic over. But the slip does have a pleasant scent of watermelon and cucumber allowing for even those with discerning noses to use the product. From my point of view it’s great as I still offer evening appointments at my home and no longer have the strong chemical acrylic smell and therefore a family who whine at me, but instead a pleasant smelling home where no one even knows when I am creating beautiful extensions.

Polygel is currently available in 6 colours:

  • Bright white
  • Soft white
  • Natural clear
  • Light pink
  • Dark pink
  • Cover pink

These can give a great pink and white finish or easy infill to be able to easily see the condition of the natural nails underneath. I do hope going forward Gelish release a few new colours, ie a few other cover pink shades and a crystal clear. I have encapsulated using both the dark pink and the natural clear polygel, however this tones down the sparkle and shine of the glitters. Chunky glitters work ok but fine powders look matte.

Application Process

With any extension or overlay product preparation is key, so make sure the nail plate is clean and neat and apply the ph bond and pro bond (making sure to avoid the skin, only a small amount is required). You then use their tag line “squeeze, slice and roll” to remove the product from the tube with a metal slicing tool and place the bead on the nail plate. As mentioned above you can do this on all 5 or 10 fingers at once to save time (but I do recommend quickly patting the thumb beads down before actually perfecting the product application.

You only need the smallest amount of slip on the brush, so dip it in to the dish, wipe on both sides and then wipe on your couch roll or napkin what ever you use and then use it to move the product around the nail. Although the product is marketed with no heat spikes if you apply too much Polygel or use too much slip on the brush you will end up with heat spikes. Also out of habit I flash cure for 5 seconds just so clients do not experience this.

Polygel application

If you are new to extensions start by using the tips, this will give you a base to apply to and makes applications such as pink and white or baby boomers much easier. I would also recommend you cure the cover pink and the whites for 1 minute as opposed to 30 seconds.
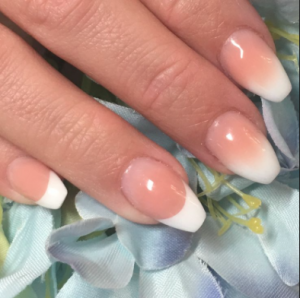
French and baby boomer on day 2 of training
French and baby boomer on 2nd day of training

If you are going straight into pink and white or baby boomers on sculpted forms, if you are not using a clear from then you are running the risk of the product under curing. Now although I have done both and do do both there’s a few points to watch out for. First once applied and cured for 30 seconds, remove the form and turn the hand so the palm is upwards, chances are you will have stalagmites of Polygel on the underside of the nail, you can then wipe these flat with the brush and replace the hand normally in the lamp so the underside is cured using the mirrored base of the 18G lamp. As long as your application was thin this should be fine. If however your application has been too thick both the top and bottom the Polygel will appeared cured but the middle wont be, this means you could potentially end up with the nail snapping as the strength isn’t there. The easiest way to avoid all of these problems is to create a thin clear sculpted extension and then place pink and white Polygel on top.

I have read a few people have had problems with longer extensions using Polygel. Personally I think it works great for longer length nails and I definitely find it easier due to the free reign of time it gives you. I have not had a problems with them breaking or coming away, so can only think that the problem was with their application.

Moulding time is a bit trial and error depending on the length and shape required but I usually it seems to be around 10 seconds.

Durability

I have been over the moon with the longevity and durability the Polygel provides. 84% of my treatments (statistic between 1st April – 31st July 2017) now use Polygel, be it for extensions or overlays. All of my hard gel clients have switched over and all bar 2 of my acrylic clients also switched and the only reason they didn’t is because they have acrylic design. My application and infill times have been reduced as there is very little lifting, which means very little filing. I think the flexibility of the product allows the nails to move underneath a little so lifts less, but this is just speculation on my behalf. It has meant that for many clients they now only need to come in once a month instead of every 2 weeks. And still there is very little lifting if any.

Removal

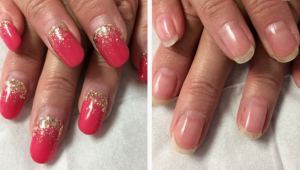
This is a buff off only product, although if you file the bulk down you can sometimes soak the remainder off alternatively I know some people apply Gelish foundation first to aid in soak off removal but I haven’t tried this. I haven’t had any problems with removal as the product is so easy to file that I haven’t needed to try them. What’s also great about this product is that the dust falls to the mat and does not fly up and linger in front of you and your client so less inhalation of product occurs.

Polygel removal after 6 weeks

Costings & Timings

This is a costly product especially here in the UK with import costs and various other factors. However with the release of the single items being available at Sallys Salon Services this means that the products will now be available VAT free saving a whopping 20% on specified days and I imagine Nail Harmony UK will also offer this as well, although I can not say for definite. But below are 2 different tables showing the costings pre vat (assuming you have the sense to buy it at those times).

The timings are based on how long it takes me to do the treatment. All of my clients (unless artwork is required) are booked out for 90 minutes allowing me to try and perfect and improve or any potential problems or he odd nail repair that maybe required.

* Tips takes me longer as I do not do them very often and isn’t my strongest area.

** As my clients now get longer out of their nails without any lifting, a few get board with the colour or design so I offer a refresh where by I just change the Gelish colour on top without infilling within the first 13 days.


Costings Polygel Wd

Art & Design

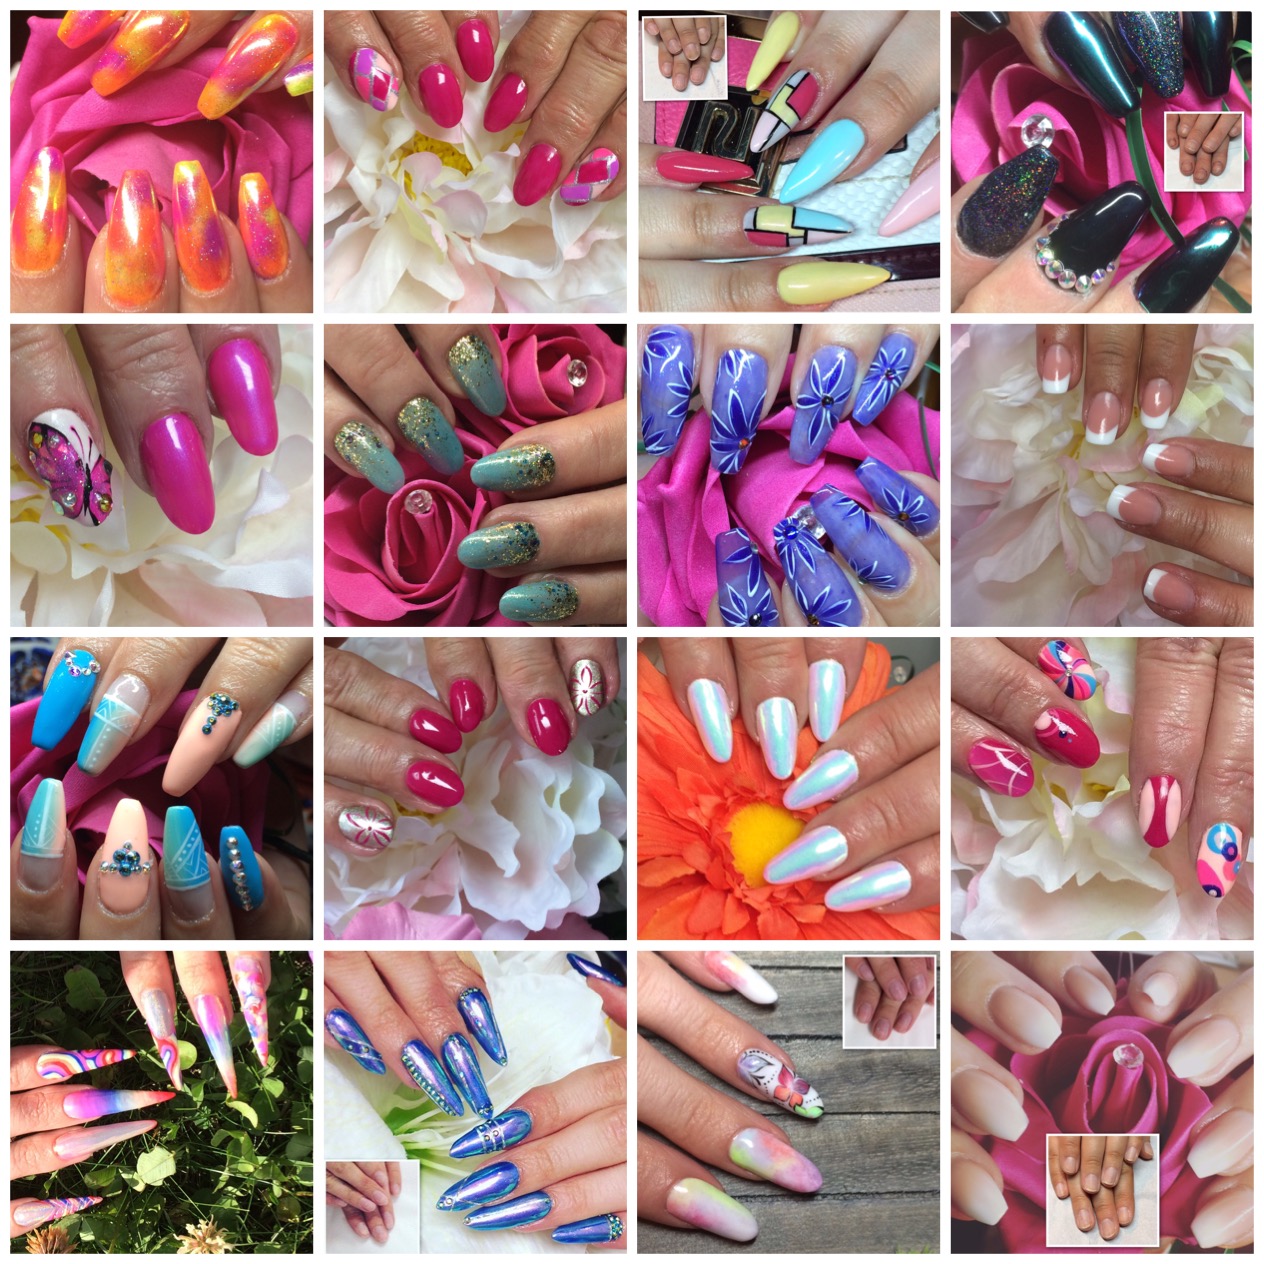
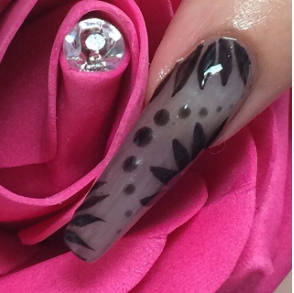
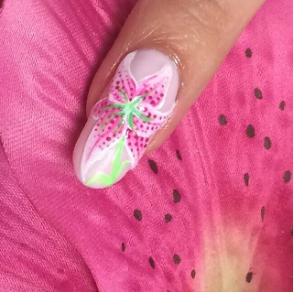
As mentioned above there are only a few colours, but you can mix in Gelish gel polish, pigments of glitters depending on the end effect you are after. But at the moment this product doesn’t offer the variety of designs achievable like an acrylic would.

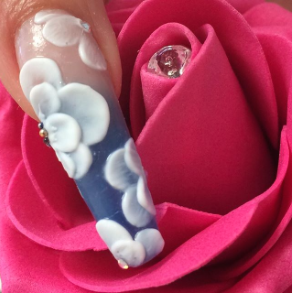
Black art 3d Lily Blue fade with flowers

Availability & Training

On its release here in the UK you could only buy the kit if you paid upfront for full training, which depending upon your experience was either 2 days or 2 days plus a nail essentials training which is usually half a day. Now that quite a few techs here in the UK trained and brought the kits and the release of Polygel around the world the market has opened up here and non trained members are able to purchase Gelish Polygel through Sallys and Nail Harmony UK without training. All trained Polygel technicians will have a window sticker and training certificate to prove their qualification and although simple to use in order to be insured using the product you must attend a training so contact Nail Harmony to find out who your nearest educator is.


I hope some of you find this helpful. Both myself and my clients love it and I am sure you will to. If you have any questions please feel free to drop me a message or if you want to check out some more of my Polygel nails then find me @elysiasharmony on instagram, twitter, facebook or pinterest. Happy Nailing 🙂
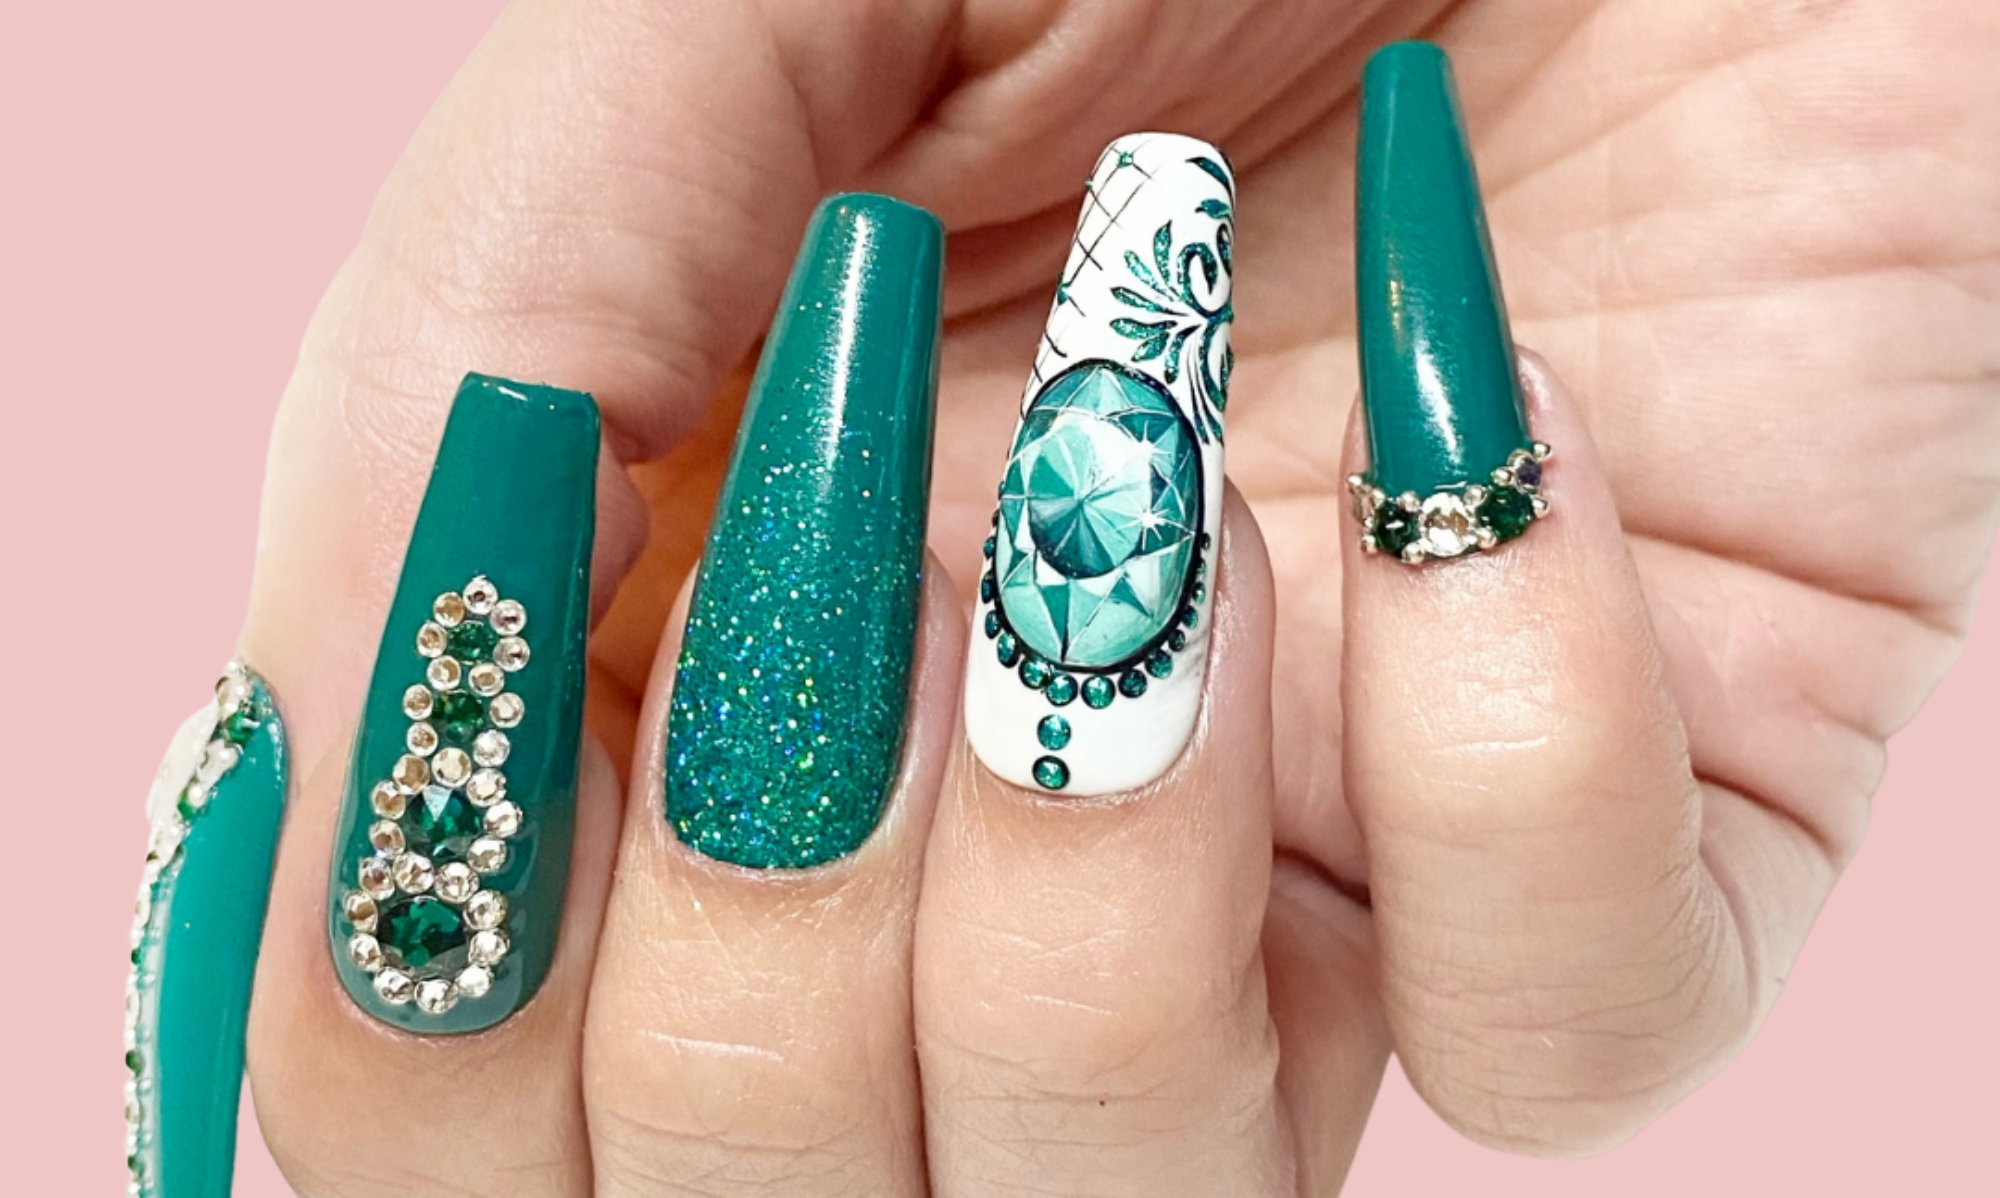


Gelish Wrapped In Glamour – Autumn / Winter 2016 – Just Naughty Enough, Lets Get Frosty, Girl Meets Joy, You’re So Elf Centred, Rocking My Stocking, Who Knows Rudolph

Hello everyone

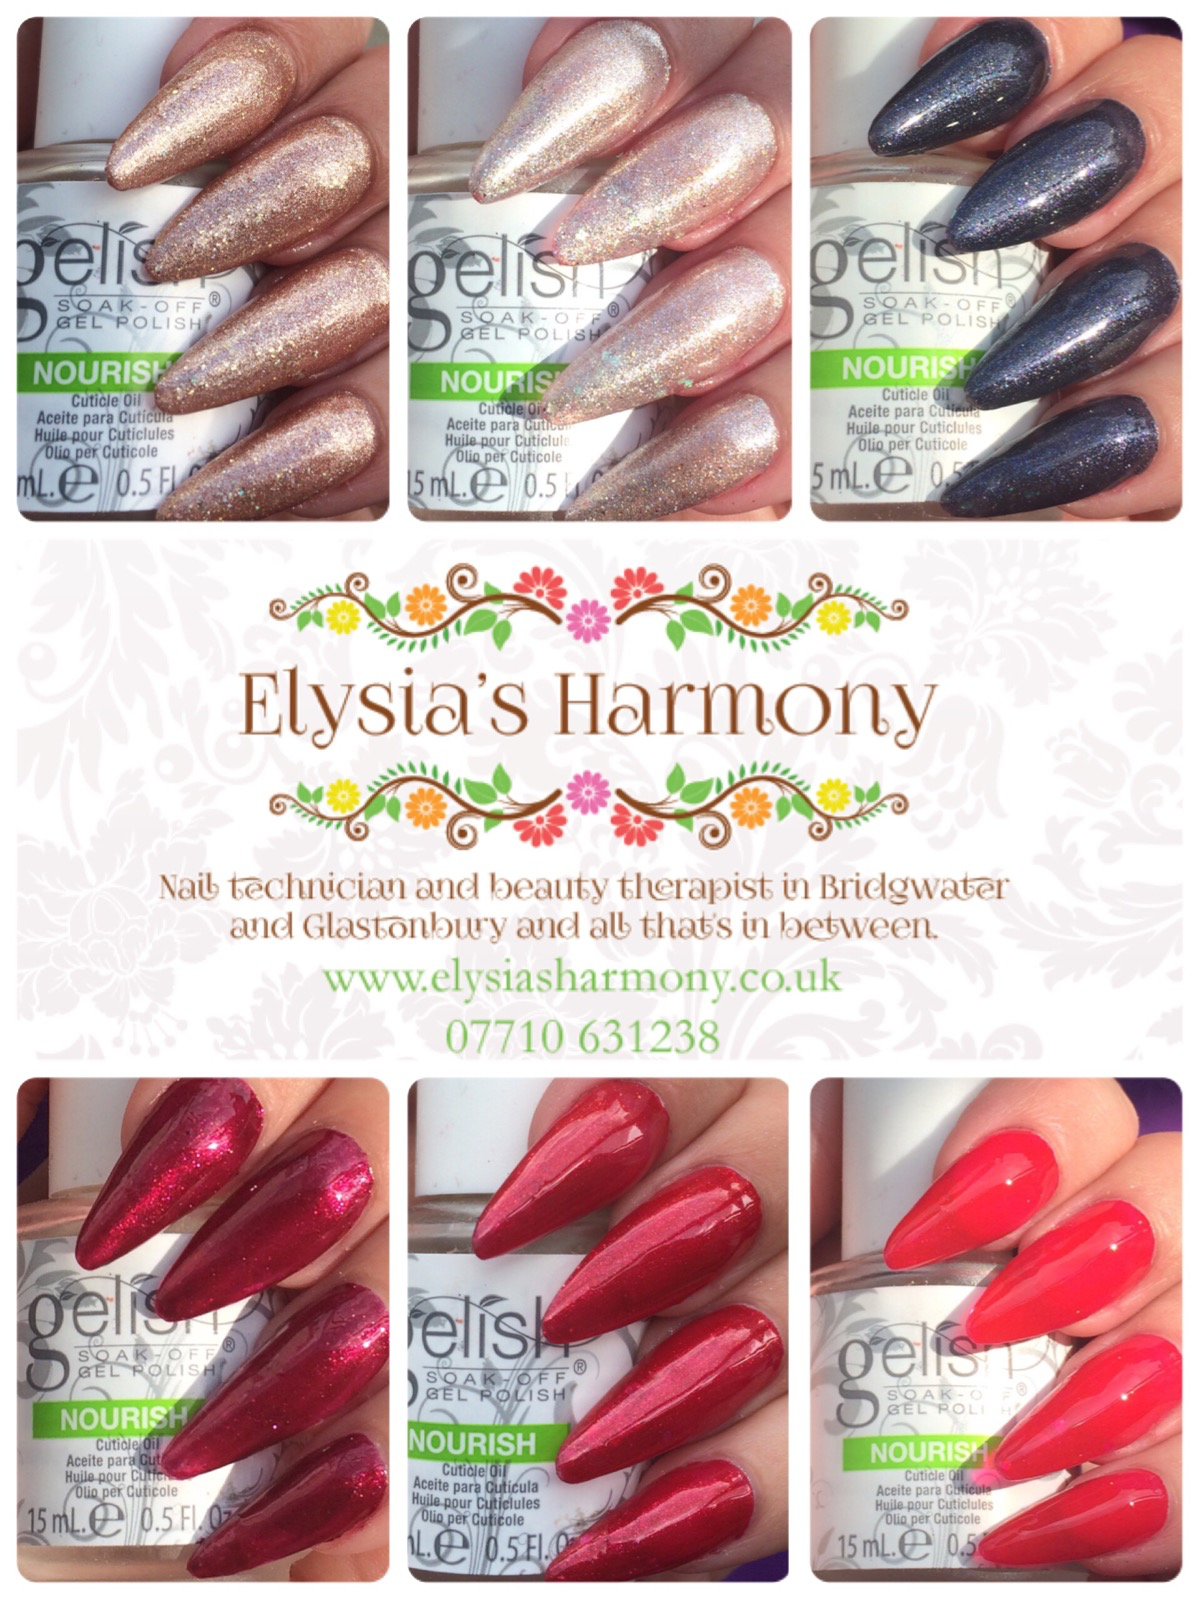
Well I’m pleased to say Gelish have nailed the application of these 6 shades, each one applying in 2 coats. This Autumn / Winter collection comprises of 3 reds and sparkly rose gold, silver and black / blue.

The colours have been applied over p&w style prohesion and due to the course I’m currently studying stilettos. As per usual the pictures show indoor, led and outdoor lighting. However it has been very gloomy and I have not managed to get any shots in the sunshine so will upload some more pictures further down the line. In the mean time let’s take a look at the colours.

Just Naughty Enough – 2 coats

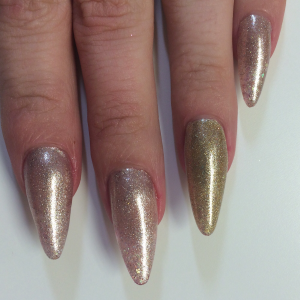
This colour has been marketed as a pink with glitter. On application the gel is a orange bronze (which in its self would have made a great colour), but once cured gives the rose gold colour. It’s in-between oh what a knight and last call but with a bit more sparkly bits.

Just Naughty Enough Lighting On Hands - 2 Coats
Just Naughty Enough Lighting On Hands – 2 Coats

Let’s Get Frosty – 2 coats

Again applying beautifully, this is bright and light with sparkles of red and pink. Personally I like my silvers to stay silver but a unique colour. When you first apply this colour it looks very gold, however cures to silver. The reason being that the photo initiators in the product show as yellow. Once the photo initiators are used in the curing process the yellow colour is no more.

Lets Get Frosty Lighting On Hands - 2 coats
Lets Get Frosty Lighting On Hands – 2 coats
Lets Get Frosty Uncured Ring Finger

Girl Meets Joy – 2 coats

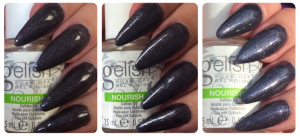
This new colour is a dream and will be great for the partying season. It’s a very dark indigo with blue, purple, pink and silver flecks. Think Angel in disguise on steroids.

Girl Meets Joy Lighting On Hands - 2 coats
Girl Meets Joy Lighting On Hands – 2 coats

You’re So Elf Centred – 2 coats

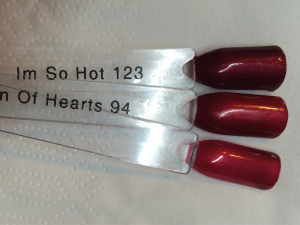
Another fabulous red frost, a little darker but on the same lines as I’m so hot it will be a staple colour. If you don’t have I’m so hot or what’s your poinsettia then a great investment.

You're So Elf Centred Lighting On Hands
You’re So Elf Centred Lighting On Hands

Rocking My Stocking – 2 coats

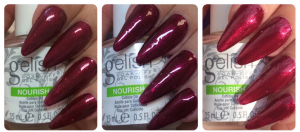
I love this colour, it’s glittery shimmery lushness. A mix between good gossip and queen of hearts this will be exceptionally popular around the festive season.

Rocking My Stocking Lighting On Hands - 2 coats
Rocking My Stocking Lighting On Hands – 2 coats

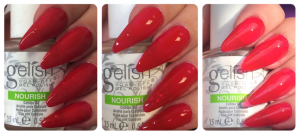
Who Nose Rudolph? – 2 coats

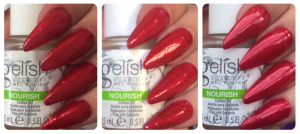
This is a fabulous pillar box red it’s leaning to the bluer spectrum as opposed to orange or pink. I did experience ever so slight shrinkage so be careful to cap the edge. Also there was quite a bit of transfer on to my top it off. To try and avoid this, cure each layer twice and make sure to float the top coat.

Who Knows Rudolph Lighting On Hands - 2 coats
Who Knows Rudolph Lighting On Hands – 2 coats

Matte vs Top It Off Comparisons

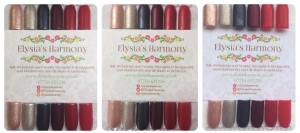
Wrapped In Glamour Collection Swatches

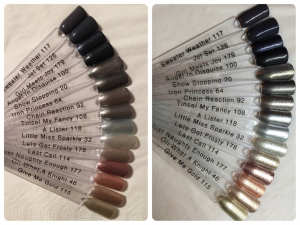
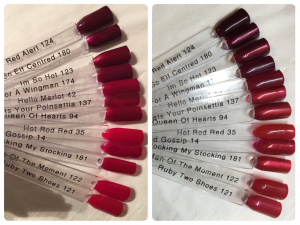
Swatch Stick Comparisons

Wrapped In Glamour - The Sparkles
Wrapped In Glamour – The Sparkles
Who Knows Rudolph Comparisons
You're So Elf Centred & Rocking My Stocking Comparisons
You’re So Elf Centred & Rocking My Stocking Comparisons

Summary

The application of these colours is right on the money. You can see this collection being great for the party season with lots of glitz and glamour. Some of the colours are similar to past releases but will still fly off your shelves. If I were to pick 3 to purchase I would go with girl meets joy, you’re so elf centres and rocking my stocking.

I’d love to hear your thoughts or see any pictures 🙂
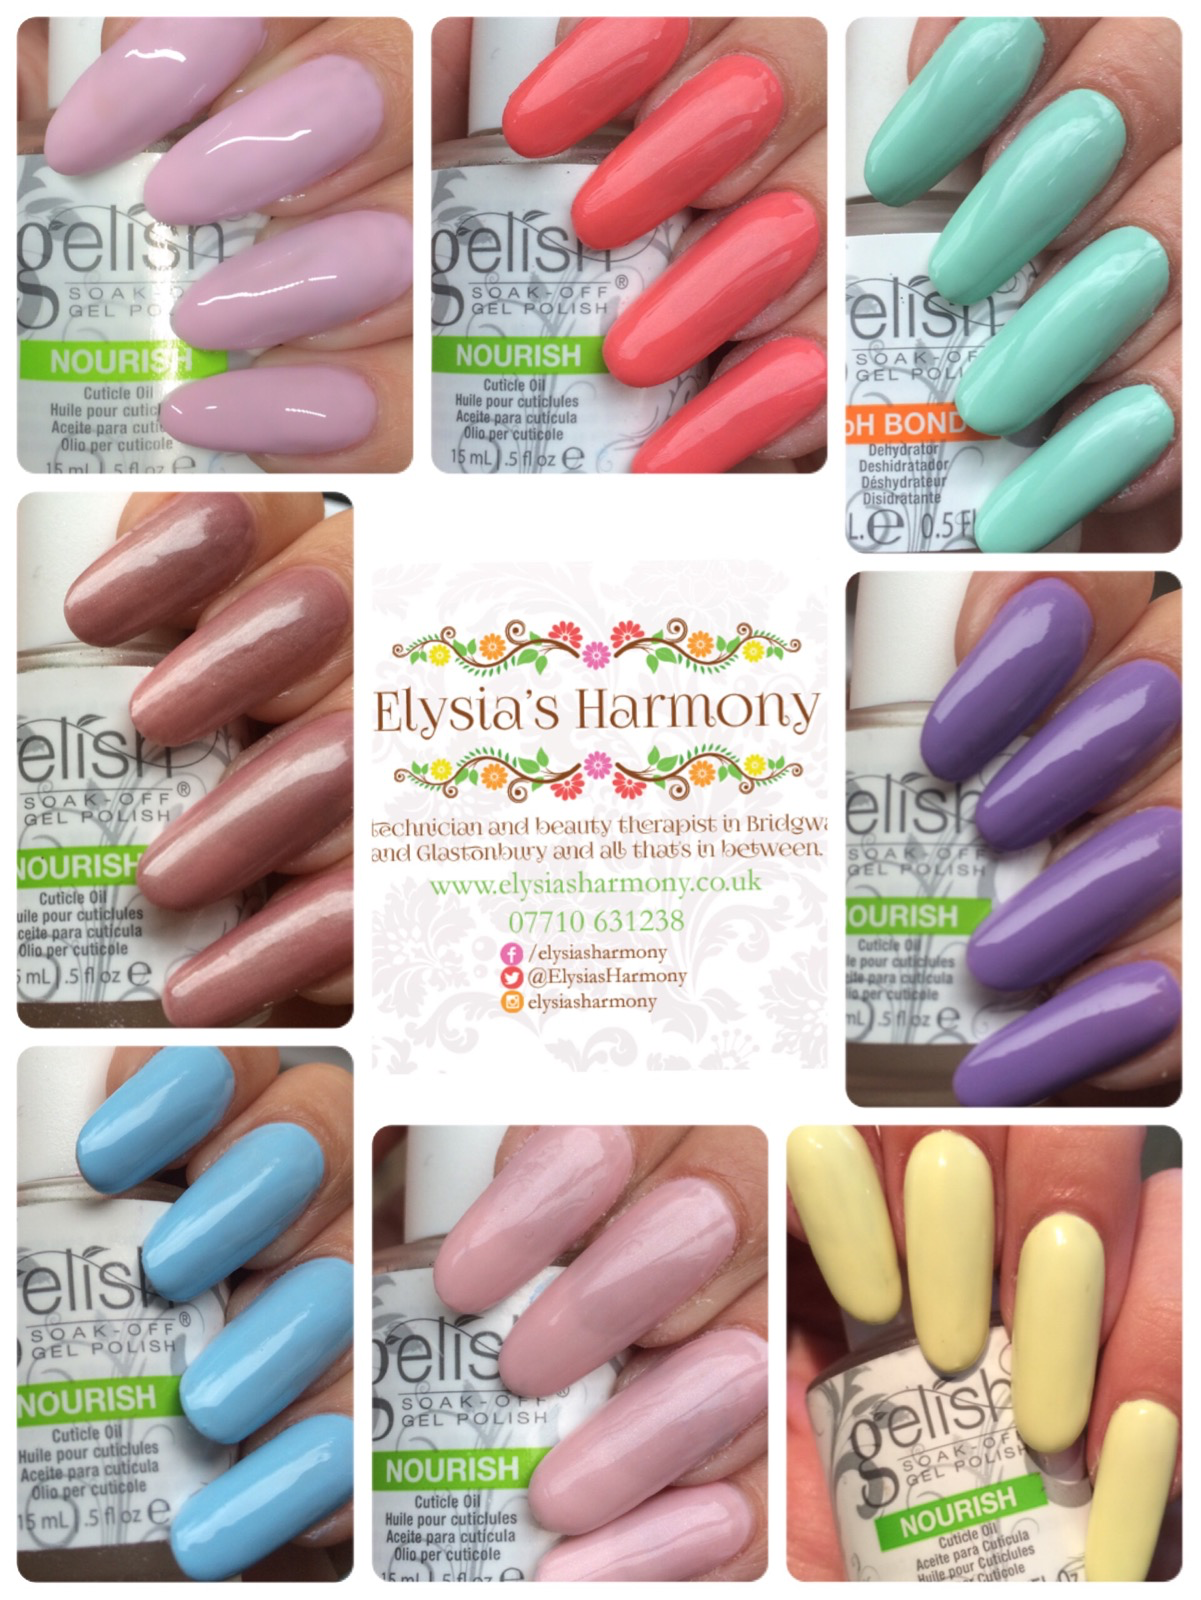
Gelish Sweetheart Squadron Collection Autumn 2016 – Up in the air-heart, Perfect landing, Put a wing on it, Looking for a wingman, Oh para-chute, Rule the runway


The latest Gelish collection for Autumn 2016 is the Sweetheart Squadron collection. Available from nail harmony UK as of the 30th July. It consists of 6 fantastically autumnal shades from nudes, to reds and a khaki green. So let’s take a look.

Up in the air-heart – 3 coats

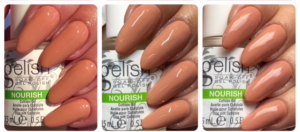
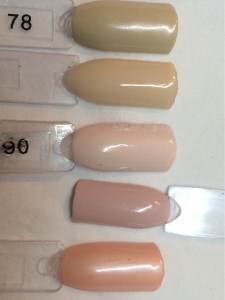
This is a dusky peach colour which will be good if you have lots of clients wanting a nude with a twist. I think it probably suits the more tanned and dark skin tones but if you like it go for it 🙂
Up In The Air-Heart lighting pictures on hands

Perfect landing – 2 coats

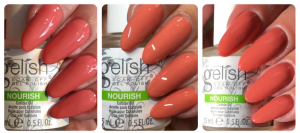
I really like this smoky coral colour, perfect again for those wanting to keep things on the neutral side but feeling a little adventurous. It is fairly similar to others, the new sun kissed bliss and sweet morning dew, but us slightly duskier. It’s been a firm favourite of clients already.

Perfect Landing lighting pictures on hands

Put a wing on it – 2/3

This vibrant red had been given a new twist with a golden shimmer. The pictures above show 2 coats which if you’ve got flawless nails will be more then fabulous. However on mine where I’ve been swatching the other colours you can see where I haven’t quite got all the previous polish off, so don’t cut corners with this one as it is beautiful and applies nicely to.

Put A Wing On It lighting pictures on hands

Looking for a wingman – 2 coats

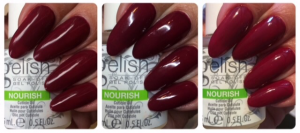
I’m in love with this beautiful rich burgundy colour, it’s truly stunning and I can’t wait to do some beautiful designs with it in the autumn. It’s suitable for most clients professional, mature and young and it applies lovely. I didn’t experience any shrinking or bleeding with this one. I love it. Due to this I’m including the picture below of them whilst I was applying pulsar from the nail space on a clients nails. This will be a very popular combo come Christmas.

Looking For A Wingman lighting pictures on hands

Oh para-chute – 2 coats

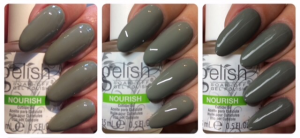
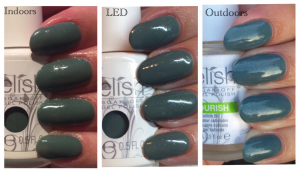
If you’ve been waiting for a khaki green you’ve got it with this understated sage. It applies beautifully in two coats. It is suitably different from holy cowgirl as its got much more of a grey tone.

Oh Para-chute lighting pictures on hands

Rule the runway – 2 coats

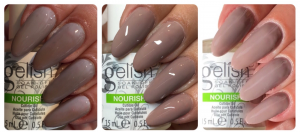
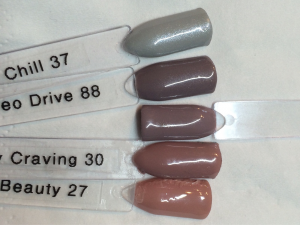
Another grey taupe, but it applies beautifully in two coats and is a little lighter then rodeo and I orchid you not, but not an essential.

Rule The Runway lighting pictures on hands

Swatches

Sweetheart Squadron Collection Matte vs TIO
Up In The Air-Heart & Rule The Runway Swatch Comparison Pictures
Perfect Landing Swatch Comparison Pictures
Put A Wing On It Swatch Comparison Pictures
Looking For A Wingman Swatch Comparison Pictures
Oh Para-chute Swatch Comparison Pictures

Summary

The application of these colours are once again great.  With several of these colours set to stay firm favourites. I am pleased that they offers a few new shades to my collection. My top 3 for clients would be perfect landing, looking for a wingman and put a wing on it. Oh parachute is lovely and a bit different but is unlikely to fly off the shelf.

As always I’d love to hear your thoughts 🙂
Gelish Secrets Collection From Nail Harmony UK – Part 1 Pastels, swatches, comparisons, matte and lighting differences. Hidden Identity, Kiss Kiss, Once Upon A Manicure, Picture Perfect, I’m A Wildflower, Made About Mint, A Tribe Called Cool, Sun Kissed Bliss

Hi all.

Here’s the a few of the Secrets collection only currently available in the UK. It was first released on the 1st July with singles being available straight away through educators. The entire collection of 16 is now available online but only as a whole collection.  As per usual the lighting pictures are indoor, led and outdoor but are on Prohesion L&P extensions.

The collection comprises of 16 colours created especially by requests from UK nail harmony techs. What this means is there are some fantastic colours available. I haven’t purchased the entire collection yet but did buy the pastels along with sun kissed bliss. The results of which you can find below. With these new Gelish colours only just released that means there are currently no Morgan Taylor or All That Jazz polish matches.

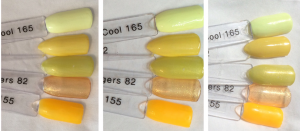
A Tribe Called Cool – 3 coats

This is what we’ve all been waiting for a pastel yellow. It does need warming but applies well in 3 coats.

A Tribe Called Cool Indoor, LED, Outdoor

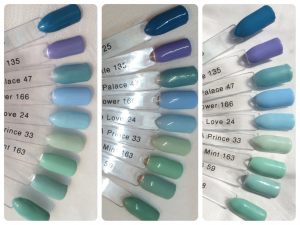
Mint madness – 2 coats

This colour applied beautifully in 2 coats. It’s much lighter then mint of Spring and is like a mix between my one blue love and kiss me I’m a prince.

Mad About Mint Indoor, LED, Outdoor

I’m A Wild Flower – 2 coats

This is a beautiful pastel blue. It’s slightly darker then my one blue love, but its application is far superior. Do warm up whilst prepping though.

I'm A Wildflower Indoor, LED, Outdoor
I’m A Wildflower Indoor, LED, Outdoor

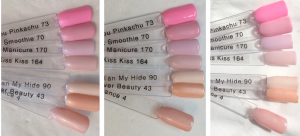
Kiss Kiss – 3 coats

This is the latest pastel pink, I do recommend you warm though as I have had it wrinkle on me, so super thin coats are needed. It’s a bit like light elegance but more opaque.

Kiss Kiss Indoor, LED, Outdoor

Once Upon A Manicure – 3 coats

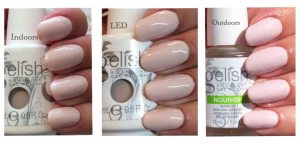
This is a baby pink with a hint of purple. Again this one needs  to be warmed and applied super thin as it did have a tendency to wrinkle. I’m not overly happy with the pictures here so will update them when I have a chance. As a result I’m including a simple set taken in natural daylight.

Once Upon A Manicure Indoor, LED, Outdoor
Once Upon A Manicure Outdoor

Hidden Identity – 2 coats

This is a beautiful frosted light brown. It applies superbly in 2 coats and would be excellent for those who want to keep their nails neutral.

Hidden Identity Indoor, LED, Outdoor

Picture Perfect – 2 coats

Another must from the collection. A dark lilac with no fading. It comes across quite dark in the official pictures but is much lighter in the sunshine. A definite must.

Picture Perfect Indoor, LED, Outdoor

Sun Kissed Bliss – 2 coats

This burnt coral is a dream to apply in 2 coats and is just simply stunning.

Sun Kissed Bliss Indoor, LED, Outdoor


Swatches

Top it off vs matte – to give you an idea of how easy the application was on most. My 3 year old daughter swatched all of the matte ones and a couple of the top it off ones.

Secret Collection Pastel Swatch Stick Comparisons Matte vs TIO Indoor, LED, Outdoor

Colour comparisons

Hidden Identity Swatch Stick Comparisons Indoor, LED, Outdoor
Once Upon A Manicure & Kiss Kiss Swatch Stick Comparisons Indoor, LED, Outdoor
Picture Perfect Swatch Stick Comparisons Indoor, LED, Outdoor
I'm A Wildflower & Mad About Mint Swatch Stick Comparisons Indoor, LED, Outdoor
I’m A Wildflower & Mad About Mint Swatch Stick Comparisons Indoor, LED, Outdoor
A Tribe Called Cool Swatch Stick Comparisons Indoor, LED, Outdoor
Sun Kissed Bliss Swatch Stick Comparisons Indoor, LED, Outdoor

Summary

These colours are beautiful and most apply really well. I have a feeling that once I am used to applying once upon a manicure and kiss kiss that the wrinkling issues I experienced would be ironed out. As with all the colours by Gelish, every single on is made differently so we as good techs have to learn how to adapt. And after all it’s much cooler here in the uk as opposed to California so a bit of warming is to be expected.

I’d love to hear your thoughts and see your pictures from this collection.

Gelish Street Beat Collection Review – Cou-tour the streets, B-girl style, Hip hot coral, Tag your it, Street credible & Give me a break-dance swatches and comparisons

Hi all.

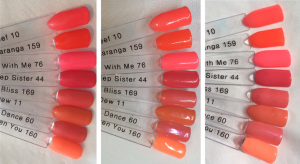
Here’s the newest summer collection from Gelish. First released in the UK at the Birmingham beauty show in May with main sale opening 27th May 2016 (Sally’s are meant to release them on the 28th of June).  This time the swatches are back on my natural nails and as per usual the lighting is indoor, led and outdoor. The collection comprises of 6 upbeat colours and comes with a very upbeat speaker to (which is fairly descent) and draws inspiration from street art. There are as per usual Morgan Taylor matching polishes.

Cou-tour the streets – 3 coats

This colour has been advertised as a lilac cream and it does indeed have a lilac tone in it when I was grouping it with my swatches. To look at on its own I personally see a light bubblegum pink. I found the application a little watery with this one 🙁 so lots of warming and stirring is required for a nice application in 3 coats. I do not have similar colour to this and will be a nice addition to my collection.

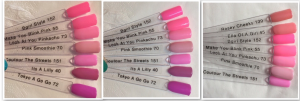
Cou-tour the streets comparison pictures

B-girl style –  2 coats

This is beautiful neon pink peal with a good application, I love it. This is most like make you blink pink but with a far superior coverage.

B-girl style lighting comparison pictures

Hip Hot Coral – 2/3 coats

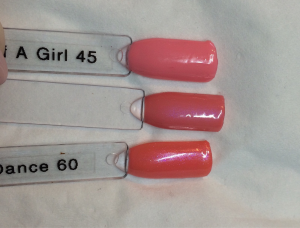
This bright coral red is beautiful with a stunning orange gold pearl finish and is unlike any other Gelish colour I have. I think it again could possibly benefit from a white underneath but is a personal choice. A new colour to my collection and I can see it be very popular.

Hip Hot Coral lighting comparison pictures

Tag your it – 2 coats

This bright fascia pearl has fantastic coverage and great application in 2 coats. It is quite similar to kung fu fuchsia but a little lighter and I can see it being very popular.

Tag Your It lighting comparison pictures

Street Cred-ible – 3/4+ coats

This is an orange yellow which is really very beautiful, however the application and consistency are a little thin for my liking. You can see from the swatch comparisons below the difference putting white beneath it makes, so I think I would probably do 2 arctic freeze and 2 colour coats. This picture actually has 5 coats. On practice with the application of this colour I have come up with two options.

  1. Apply a thin coat (not curing, then another thin coat and cure, do this three times and you get a beautiful coverage.
  2. Apply two coats of arctic freeze and the. Either 1 or 2 coats of colour to give a beautiful coverage.
Street Cred-ible lighting comparison pictures

Give Me A Break-dance – 2/3 coats

This teal pearl is very beautiful and I do not think the pictures do it justice. The application was OK in 2 coats however I think I will stick with 3 for clients. Its got a nice shimmer in it however is very similar to rub me the sarong way, so if you already own that I think unless you really desire this its not really a must have.

Give me a break-dance lighting comparison pictures

Swatches and Comparisons 

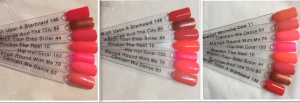
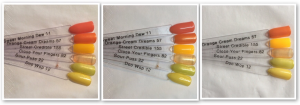
Street Beat Swatches Indoor Light
Street Beat Swatches LED Light
Street Beat Swatches Day Light


Cou-tour the streets swatch comparisons
B-girl style swatch comparisons
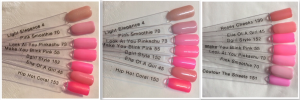
Hip Hot Coral swatch comparisons
Tag Your It swatch comparisons
Street Cred-ible swatch comparisons
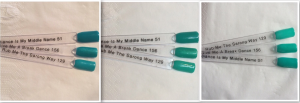
Give me a break-dance swatch comparisons
Street Cred-ible & Hip Hot Coral with arctic freeze underneath

Summary

I was really looking forward to this collection and the colours do not disappoint. The application isn’t quite what I have expected of recent collections but is still reasonable once you’ve figured out what works best for you. Business wise my top 3 would be: B-girl style, Hip hot coral and Tag your it, as these three would be in my view the most popular with clients and have a reasonable coverage. For me personally I would buy: Street cred-ible, Tag your it and Give me a break-dance as they are colours I would wear.

I hope you find this helpful and would love to hear any comments or feedback you have 🙂
 

Gelish A Very Nauti-cal Girl Collection – Catch My Drift, Wish Upon A Starboard, Girls Love Buoys & My Yacht Rules

Hi all

Here’s another beautiful collection from Gelish, perfect for Spring and summer. The collection launched in the uk in early May 16 is comprised of 4 colours, these being a red, bright magenta, blue and white, there are matching Morgan Taylor polishes. Once again my upcoming trainings mean I have liquid and powder extensions on and the usual indoor, led and outdoor pictures can be found.

Catch my drift – 2 coats

Catch my drift lighting comparisons
Catch my drift lighting comparisons Indoors, LED, Outdoors

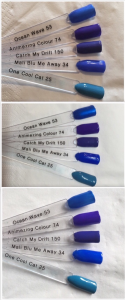
This cobalt blue crème is stunning. It has a really beautiful hint of purple in it to make it different from ocean wave and Mali-blu me away. I’m relieved to have this colour in my collection now as it applies beautifully in 2 coats as opposed to the above mentioned blues which can take many more. So a definite must if your clients like blues.

Wish upon a starboard – 2 coats

Wish Upon A Starboard Lighting Comparisons Indoors, LED, Outdoors

Yes it’s yet another red crème, but this time I’m more then happy. It’s a new tone to my collection as it has a very orange tinge to it, which is perfect for the summer and has already proved very popular.

Girls love buoys – 2 coats 

Girls Love Bouys Lighting Comparisons Indoors, LED, Outdoors
Girls Love Buoys Lighting Comparisons Indoors, LED, Outdoors

As you guys know I’m not the biggest fan of pinks on my own nails, but I have to say I LOVE this one. It’s a bright beautiful magenta and it’s stunning with great application.

My yacht rules – 3 coats

My Yacht Rules Comparisons Indoors, LED, Outdoors

This is the first one I swatched and by golly did it show the imperfections in my l&p. The coverage was OK in 3 coats, but you need to make sure you do not put it on too thick. It’s got a shimmer to it so is kind of like mixing sheek White with my secret Santa.

Swatches & Comparisons

Collection TIO vs Matte

A Very Nautical Collection Matte Vs TIO Comparisons Indoors, LED, Outdoors

Catch My Drift

Gelish Catch My Drift Swatch Comparisons

Wish Upon A Starboard

Gelish Wish Upon A Starboard Swatch Comparisons

Girls Love Buoys

Gelish Girls Love Bouys Swatch Comparisons
Gelish Girls Love Buoys Swatch Comparisons

My Yacht Rules

Gelish My Yacht Rules Swatch Comparisons

Summary

I love this collection and it works really well in the scheme of colours I already have so a good buy. If I were to buy them as singles it would be in this order: Girls Love Buoys, Wish Upon A Starboard, Catch My Drift and My Yacht Rules.

Id love to hear your thoughts, so feel free to leave comments  🙂

Botanical Awakenings Collection

Hi all

Here are my swatches for the new spring Botanical Awakenings Gelish collection launched in the UK as singles straight away on the 25th March 2016.

At first glance this collection doesn’t really have any must have stand out new colours, however on closer look I consider this collection a good buy, in that they are staples that your clients will want to go back to time and time again. The collection is based on fresh floral colours which includes 2 neutrals, 3 pinks and a red. After last springs discontinued ooh la la collection (which I loved) I’m glad to see some slightly similar shades. There are Morgan Taylor nail lacquer matches available.

So let’s take a look at the colours (the pictures show the colours over hard gel extensions following my fabulous PhD training – totally worth doing).

Rose-y Cheeks – 2 coats (needs warming)

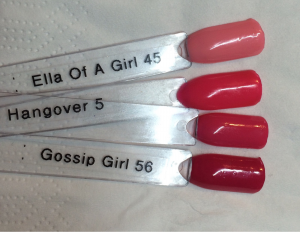
When I looked at this colour on the advertising I felt it looked a lot like Ella of a girl, however on application I’m pleased to say it’s more similar to can-can we dance with its light coral pink with a pearl finish. I love this colour in the led lighting with its subtle shimmer and I can see my clients loving this one to.

Rosey Cheeks, Botanical Awakenings
Rose-y Cheeks

Warm Up the Car-nation – 2 coats

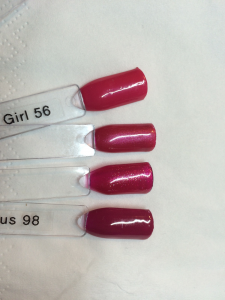
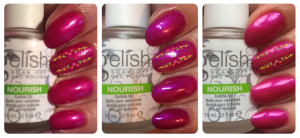
Nail Harmony state this is a hot magenta pearl and yes it has a pearlised shimmer frosty touch to it, but to me it’s more of a medium pink going towards red. Think sugar plum dreams but without the transparent finish. It applied nicely and didn’t need warming.

Warm Up the Carnation

What’s Your Poinsettia? – 2 coats

As expected this medium frosty pearl is a great two coater just like queen of hearts and I’m so hot, but it is very similar in colour, finish and application, so doesn’t really offer anything new. But is admittedly slightly lighter. That being said its been chosen by 2 clients already so is going to get well used.

Whats Your Poinsettia

Don’t Pansy Around – 2 coats

This was my favourite colour of the collection, it’s a bright (but not neon) medium crème pink. It applied nicely without any warming and is just a lovely every day colour. Please not this is an easy one to apply too thickly so keep the coats thin.

Dont Pansey Around

Prim-rose and Proper – 3 coats

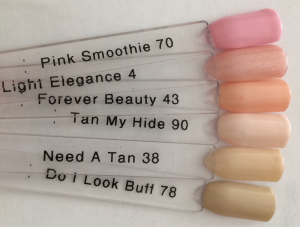
This colour is a light taupe cream with a hint of pink (less so then tan my hide). Yes it is indeed similar to other neutrals in past collections so you could do without. That being said it is different from tan my hide as you can see from the additional picture and I can see it being chosen quite a lot over the wedding season. So if you plan on doing brides and weddings I believe be it would be worth the investment.

Primrose & Proper

Primrose and Proper vs Tan My Hide

I Or-chid You Not – 3 coats

Another taupe creme which is very similar to rodeo however is more mushroom and slightly lighter and in the additional photo you can just about see the difference when applied. I actually much prefer this colour and I am looking forward to wearing it on my hands for longer then 5 minutes.

I Orchid You Not

I Orchid You Not VS Rodeo

Swatch sticks  and comparisons

I apologise for the state of my swatches I knocked acetone over on my desk when I had my light nude swatches out and it ruined quite a few and I wanted to get this out so haven’t re done them yet.

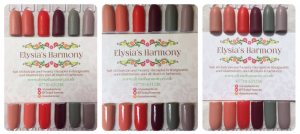
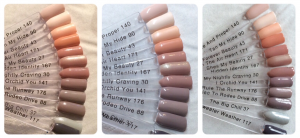
BW Full Collection swatches

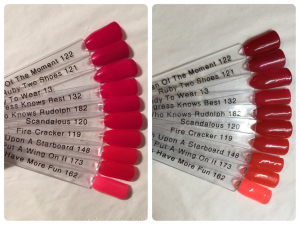
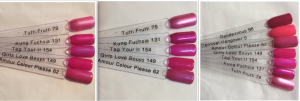
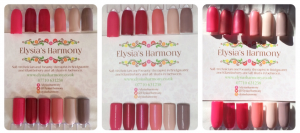
Reds Comp

Pink Comp

The bottom unlabelled swatch is sugar plum dreams.

Pink Comp 2

Pink Comp 3

Primrose Comp

Rodeo Comp

Conclusion

This is a collection full of useful every day colours that your clients will go back to time after time. My top 3 are Rose-y Cheeks, Don’t Pansy Around and Primrose and Proper.

Kung Fu Panda 3 Collection

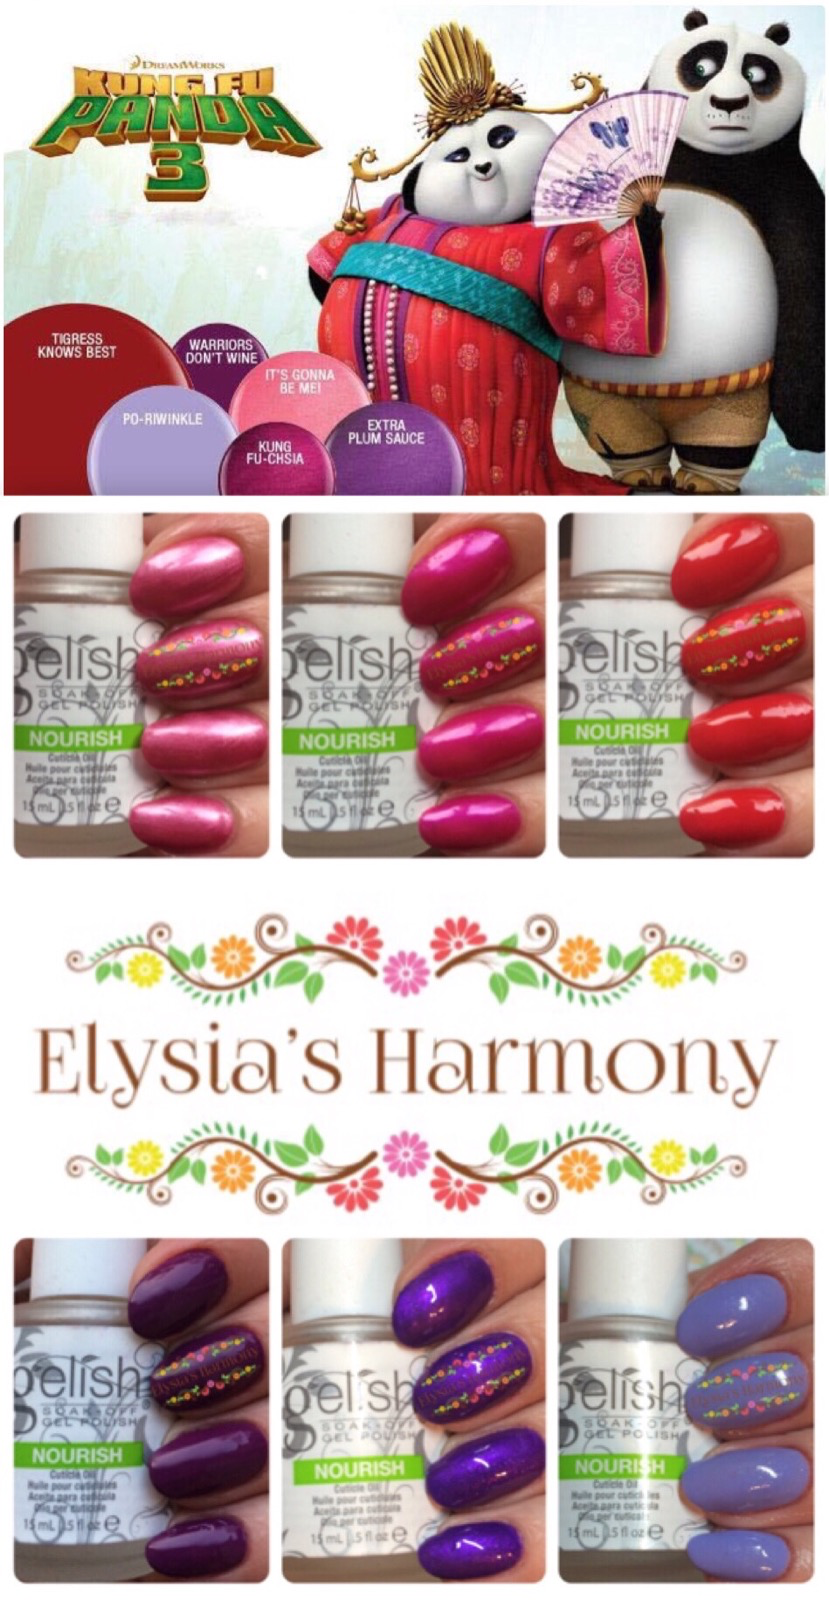
Hi everyone, here are my swatches for the Kung Fu Panda 3 collection launched by Nail Harmony UK on 28th February 2016. This collection is made up of 6 beautiful shades based on the Kung Fu Panda 3 film and most of which are ideal for spring. There has been a lot of buzz about this collection and the educators at Nail Harmony UK have been trialling them for the last few months since their release in the US in December 2015. There has also been a lot of buzz over the potential of a new lilac and I am putting it through its paces in a “colour in the spotlight” review. As per my usual way you will see the colours in different  lights so you can get a truer reflection of the colour and there is no editing effects or smoothing, just my nails painted with the legitimate colours (different lighting is indoors, LED and outdoors).  If you have any questions, want to see more comparisons or have any further thoughts and opinions on the colours please comment and share below.

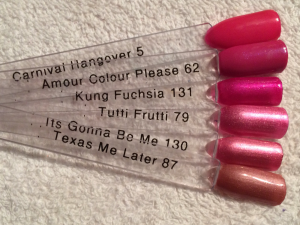
It’s Gonna Be Mei – 2 coats of rose pearl

This colour is a beautiful pearly light pink. It applies nicely in 2 coats and I can see it being popular with my older clients. It is a bit lighter and rosier then tutti-frutti but different from texas me later.

Its Going To Be Me Lighting

Kung Fu-chsia – 2 coats bright fuchsia peal

This for me is the highlight of the collection, I absolutely love its bright shimmery lushness of this colour, it applies beautifully and has proved the most popular with my clients so far. A nice new addition to the Gelish line especially as Amour colour please was a limited addition last Spring.

Kung Fu Fuscia Lighting

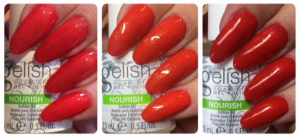
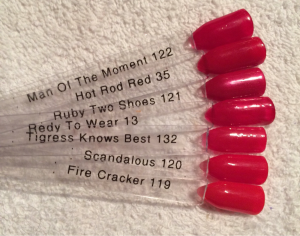
Tigress Knows Best – 2 coats hot red crème

This bright red applied beautifully in 2 coats and is a beautiful red and will be my new go to red when clients cant decide. That being said if you have hot rod red or scandalous you probably don’t really need this one, however it is easier in my opinion to apply then scandalous and fewer coats then hot rod red.

Tigress Knows Best

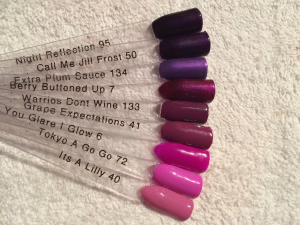
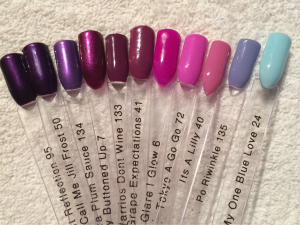
Warriors Don’t Wine – 2 coats crème plum

I love this colour it’s a really beautiful mid plum crème. I can see it being very popular with clients especially with those who like grape expectations which is a little lighter.

Warriors Dont Wine

Extra Plum Sauce – 2 coats of amethyst pearl

This colour is beautiful and will be exceptionally popular with my clients. It is a beautiful bright mid to dark purple with a shimmer pearl finish. Think Call Me Jill Frost only lighter and brighter. As far as I can tell it is completely new colour in the Gelish range. I would recommend you give this one a stir before you use it, as it did come out a little watery when I first swatched it.

Extra Plum Sauce

Po-Riwinkle – 2/3 coats of light periwinkle crème

As the name suggests this a is periwinkle blue with a subtle shimmer. There had been hopes for a lilac and although this is a beautiful colour with purple hints to it, it’s not lilac. Fingers crossed for next year. It was the only colour of the collection which required me to use 3 coats. However that being said some nails where fine after 2, so I imagine with more application practice I will get used to the amount needed and could probably do it in 2 slightly thicker coats. I can see it being very popular with younger clients and have seen some spectacular designs with it already and it is completely different to all other colours in the Gelish range.

Po Riwinkle

Since initially writing this I am pleased to say I have tested it for 2 weeks, whilst on holiday in Tenerife, going swimming in both the sea and the pools almost every day and a heck of a lot of sunscreen and after sun lotions (my daughter is allergic to the sun,) and I am pleased to report that there was absolutely NO FADING (more details in the next review). (Unfortunately the sun had gone in by the time I had painted this colour so the outside picture is on holiday a few days later.)

Swatch Sticks & Colour Comparisons

I am pleased to say that on every single swatch I only used 3 coats, so you know it’s good stuff when applying over clear sticks. The top row is what the colours look like matte and the bottom with the regular top it off.

Collection Swatch Sticks Kung Fu Panda

Reds

Purples

Pinks

Lilac

Conclusion

This collection has many new shades to offer and once again Gelish seem to have been perfecting their formulas to get them to the desired two coats. I didn’t experience any application issues with wrinkling or shrinkage with these and they seemed to be fairly flexible on the thickness of the application so should work for most and if you are having any application issues with any colours try warming the colour a little first. I am really pleased with the shades in this collection, if I had to pick just 3 they would be Kung Fu-chsia, Extra Plum Sauce and Po-Riwinkle with Warriors don’t wine close behind. Singles will be available mid March and Morgan Taylor Lacquers offering the matching colours, so a fantastic chance for retail to your clients – they will want them.

I would love to hear your thoughts or see any of your designs using these colours.

Stay tuned for the Po-Riwinkle colour in the spotlight review 🙂

Urban Cowgirl Collection Review

Hi everyone. Here are my swatches of the Gelish autumn collection from Nail Harmony UK. With this collection I have completed all the “colour in the spotlight” blogs so I should be able to give you some really useful information. You will find the colours in different  lights so you can get a truer reflection of the colour and there is no editing effects or smoothing, just my nails painted with the legitimate colours.  Let me know if there’s anything else you want to know or see.

The Urban Cowgirl collection consists of 6 core colours and 2 trends. It was launched in the UK on the 4th August 2015 with singles released on the 29th August 2015.

Tan My Hide – 3 coats

A light tan with pink tones in a crème consistency and a subtle shimmer. As it’s a crème consistency it applied a little more thickly so make sure it’s nice and warm when applying. I had no problem with shrinkage or sliding. There has been some mention of fading but personally I didn’t have a problem. This is my favourite colour of the collection and a definite must for your collection due to the unique colour.

Tan my hide - light variance

Holy cowgirl – 2 coats

This sage green crème has a beautiful subtle gold shimmer and grey tone, it’s another brand new colour to Gelish and I love it for autumn. The application was perfect and I have absolutely no complaints about this colour at all.

Holy Cowgirl - lighting variance

From Rodeo to Rodeo Drive – 2/3

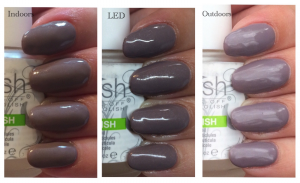
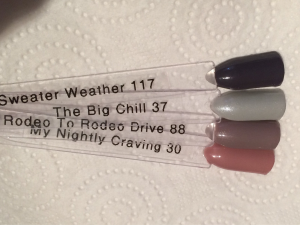
This a creme taupe has quite a grey tinge with a hint of purple to, along with a subtle silver shimmer to it.  This is the only core colour in the collection with no matching Morgan Taylor polish.

Personally I didn’t experience any problems with removal or fading with this colour but some people have suffered with fading. There is also a possible batch problem with it causing it to lift and peel after only a few days. If you do think you have one of these bottles then contact nail harmony.

Rodeo Drive - Lighting

Pumps or Cowboy Boots – 3 coats

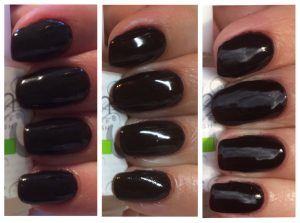
This is a black brown crème colour with burgundy / red tones. It has a smooth application but it is really highly pigmented so thin colours are a must and make sure you dry brush otherwise it can run. It is similar to black cherry berry and love me like a vamp but I don’t have either of these.

Pumps or cowgirl boots - lightring

Plum Tuckered Out – 2 coats

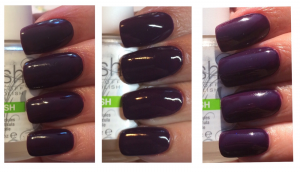
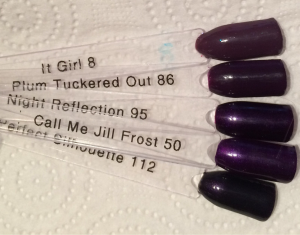
I love this colour, a dark purple crème which can look almost black but outside you can see it’s true plum colour. It’s so smooth and creamy, not to thick and not to thin, Gelish nailed this one. Diva is very similar but with the perfect consistency and application this one will make your life so much easier.

Plum tuckered out - lighting

Texas Me Later – 2 coats

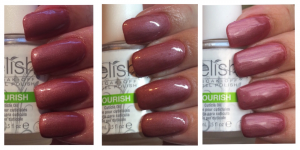
A coppery pink with a frost finish, it’s smooth and fluid so easy to apply. There aren’t any similar Gelish colours so a nice addition.

Texas Me Later - Lighting

Trends – neither of these are “toppers” but colours in them selves.

Seal the Deal – 2/3 coats

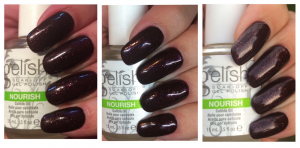
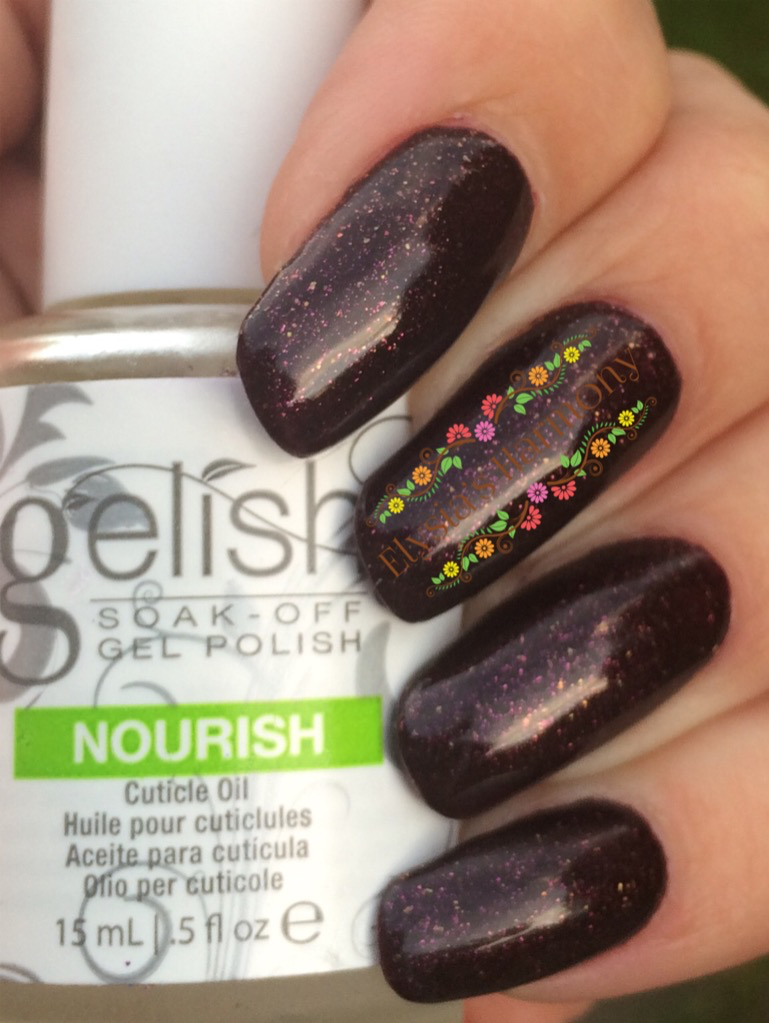
A dark burgundy which nail harmony portrays to have pink and purple flecks in. It does have them but I would say when it’s on you notice more orange, gold and red flecks. Unless in a very specific light, which wasn’t that often. Out if all of the collection I had the most compliments about this one. The application was good but make sure it’s not too thin. If you like who’s cider you on you will love this one.

Seal the deal - Lighting

Chain Reaction – 1/2 coats

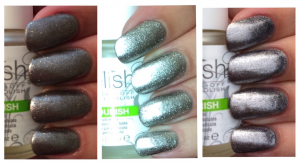
A pewter silver, so on the mid to dark side of what we have seen before. It has a frost finish and a great application so is perfect for art as well. So if you are looking for value for money this is the silver for you.

Chain Reaction - Lighting

Colour comparisons

Tan My Hide - Comparison

Rodeo - Comparison

Texas - Comparison

Seal the deal - Comparison

Rodeo - Comparison

Pumps or cowgirl - Comparison

Holy Cowgirl - Comparison

Plumb tuckered out- Comparison

Summary

I love this collection, with good applications and several really new colours it’s a great buy.

Colour in the spotlight – seal the deal

Name: Seal The Deal

Collection & UK launch date: Urban Cowgirl, 4th August 2015 (singles 29th August 2015)

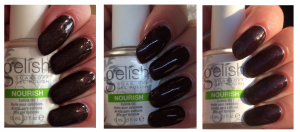
Description & personal opinion: a dark burgundy which nail harmony portrays to have pink and purple flecks in. It does have them but id say when it’s on you notice more orange, gold and red flecks. Unless in a very specific light, wasn’t that often. That being said I had lots of compliments about this colour and it is beautiful. It reminds me of embers burning out from a bonfire.

Matching nail polish: yes seal the deal by Morgan Taylor.

Viscosity: shimmer

Application: I would say a 3 coaster for a good application but you could get away with 2. Other then that nice to apply and a good consistency. Don’t make the costs to thin with this one.

Seal the deal - Application

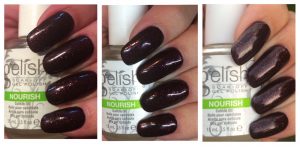
Lighting variance: (indoors, LED, outdoors)

Seal the deal - Lighting

Sparkles & trends: as this is a trend I didn’t do sparkles or glitter over the top.

Longevity: no problems

Fading: none

Seal the deal - Fading

Removal: no problems

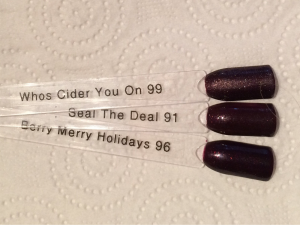
Similar colours: to me I think it’s the step between berry merry holidays and whose cider you on, so if you already have these you could probably spend your money elsewhere. However personally I love this colour as it has the different colour flecks in it.

Seal the deal - comparisons

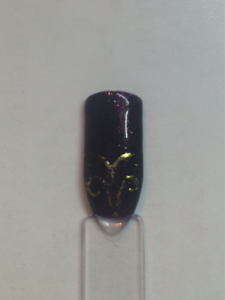
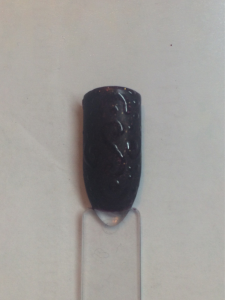
Artwork:

Seal the deal - Art 2

Seal the deal - Art 1

My verdict: nice colour and application, I’m glad I brought it.

Next week: meet the king.